Wednesday, March 11, 2009

raspberry serpentine

This is not a recipe for some exotic berry soufflé.

Our resident gen-i-us Paul had yet another trick up his sleeve when it came time to put down some berry vines. We planted two terraces with raspberry vines and the third terrace got a blackberry.
After amending the soil in each terrace with some highly fertile compost we positioned two posts on either side. These posts allowed us to string peices of twine between the two creating a place to attach the vines of our newly planted berries. (see below)

Instead of attaching all of the available vines to the makeshift trellis, Paul devised a plan to create new berry vines out of no where for free. It sounded too much like hocus pocus to me but Paul insisted. The technique was to weave any available vine of decent length into the soil and then out again like those computer generated hoax pictures of the Loch Ness Monster (see below).
so...
The idea is that the nodes on the vine that happen to fall underground will put down roots and become a brand new plant.

genius


Monday, March 9, 2009

Behold! The Mighty Bush Bean


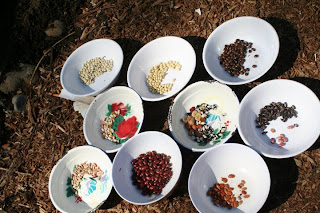
This past Saturday at the farm we planted bush beans. A bush bean can be described as a bean plant whose bushy growth does not need support, like a trellis to climb. We planted nearly ten different varieties, seen above. But first, the back story.

On these particular beds we had planted spinach. I wasn't part of that planting, but I imagine it went something like this. Two inches of compost was spread on native soil. Using digging forks and spades, the 2 inches of compost was mixed with the below 6 inches of native soil, with a little Dr. Earth mixed in for good measure. Any clods of dirt were broken up, and any stones bigger than a golf ball, and sticks bigger than a cigarette were sifted out. The loose, airy soil/compost mix was then formed into two raised, flat beds, with a 18 inch path dividing them. The spinach seeds were then planted and covered with fine, sifted compost.

Unfortunately, the spinach didn't take, and its growth stopped after a couple weeks. This is where the bush beans come in. Beans are nitrogen fixers, which means they capture nitrogen from the atmosphere and deposit it in the soil (actually, bacteria and microbes living in their roots do that in exchange for carbohydrates). Nitrogen is a key nutrient for plant growth, and beans are often used to enrich nutrient poor soil with nitrogen. We thought we'd give them a try. So...

We prepared the beds nearly identical to the spinach beds with a couple key differences. First, from turning a little bit of the soil, we could see it was dark, with plenty of organic material, so adding compost wasn't necessary this time, and in fact may have been detrimental. Again, dirt clods were broken up, stones were removed, and the beds were formed. We made 3 rows about 12-18 inches apart, and planted the seeds at 6 inch intervals, about two finger knuckles deep. This time, we didn't cover the seeds with fine, sifted compost because the beans are hearty enough to break through to the surface.

These beans were planted in the beds nearest the garden entrance, by the hay bales, so check out there progress in the coming weeks!

Saturday, March 7, 2009

Friday, March 6, 2009

Farmers Kimchi

Making kimchi is easy, my friends.

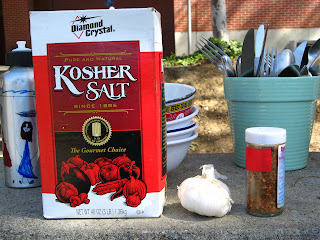
You will need: kosher or sea salt (garlic and cayenne pepper are optional)


and greens from the mustard/cabbage family (Brassicaceae).


Greens from the Brassicaceae family, such as mustard greens, kale, radishes, collards, or broccoli, contain bacteria that are necessary for fermentation. It's important not to use iodized salt because iodized salt contains an anti-bacteria.

Take a big handful of greens and roll burrito-style. Chop into little pieces.


Radishes are good too.


Using a 2x4 or 2x2 piece of wood with a flat end, bruise greens in a large bucket.


This breaks cells open so moisture can run out of the leaves.


Pound away like so.


Sprinkle 1 teaspoon to 1 tablespoon of kosher salt every 2 to 3 inches of greens. The salt will draw water out of the foliage.


You can add cayenne pepper when you add the salt.


Greens...salt...greens...salt...greens...salt...got it?


Now put a plate on top. Then put a large heavy rock on top of the plate. Cover the bucket opening with plastic wrap.


The kimchi will be ready in 4 days. The greens will shrink to about half the size and the water will rise. The fermented liquid is nutrient-rich and is good to eat. Taste the greens after 4 days and see how you like it. Store greens in large mason jars in the refrigerator. This will arrest fermentation. Make sure there is moisture in the jars.

While waiting, why not enjoy a piece of juicy grapefruit


and take time to smell the flower?